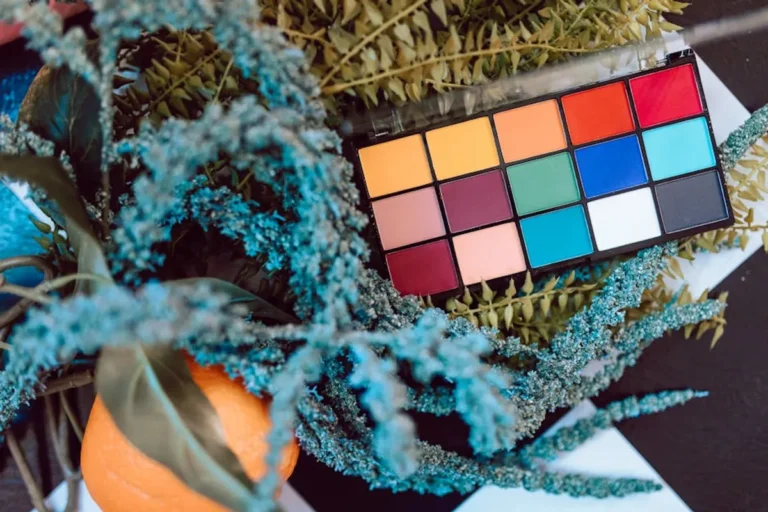

In the competitive beauty market, a product's visual presentation often dictates its commercial success. High-quality photography isn't merely an aesthetic choice; it’s a direct investment in brand perception, customer trust, and ultimately, conversion rates. Consumers scrolling through online storefronts make split-second decisions based on imagery. Fuzzy, poorly lit, or inaccurately represented products deter purchases, while clear, vibrant, and professionally captured visuals invite engagement and build confidence. This guide provides actionable strategies for beauty product photography, focusing on techniques that elevate your visuals and drive market impact.
Understanding Light: The Foundation of Flawless Shots
Light is the single most critical element in product photography. It defines shape, texture, and color accuracy. Without proper lighting, even the most expensive camera or product will yield unappealing results.
Leveraging Natural Light for Authenticity
Natural light, specifically diffused window light, is often the most accessible and effective option for beauty products. It provides a soft, even illumination that accurately represents product colors and textures without harsh shadows. Position your setup near a large window, ideally facing north to ensure consistent light throughout the day. Avoid direct sunlight, which creates stark highlights and deep, distracting shadows. If the natural light is too intense, use a sheer curtain or a diffusion panel to soften it.
Controlling with Artificial Lighting
For greater control and consistency, especially when natural light is unreliable, artificial lighting is indispensable. Simple setups involving one or two continuous light sources (like LED panels or ring lights) with softboxes or umbrellas are sufficient. These modifiers spread and soften the light, mimicking natural diffusion. A key consideration is avoiding hotspots or uneven illumination, which can make products appear cheap or distorted. Position lights to minimize glare, particularly on shiny packaging, by angling them slightly off-axis from the camera.
Reflectors and Diffusers: Essential Light Modifiers
Beyond primary light sources, reflectors and diffusers are inexpensive tools that significantly enhance light quality. A white foam board or a professional reflector can bounce light back onto the product, filling in shadows and adding dimension without introducing a second light source. Diffusers, often translucent panels, are placed between the light source and the product to soften harsh light and create a more even spread.
Composition and Styling: Telling a Visual Story
Composition dictates how elements within the frame guide the viewer's eye, while styling adds context and appeal. Both are crucial for making beauty products look desirable.
Strategic Product Placement and Framing
Apply basic photographic principles like the Rule of Thirds, positioning your product off-center for a more dynamic and engaging image. Consider leading lines, such as the edge of a table or a prop, to draw the viewer's attention directly to the product. Ensure the product is the undisputed hero of the shot, occupying a significant portion of the frame without feeling cramped.
Contextual Styling with Purposeful Props
Props should enhance, not distract. For beauty products, consider elements that evoke luxury, freshness, or natural ingredients: fresh flowers, elegant fabrics, clean brushes, or subtle natural elements like stones or leaves. Every prop should align with the product's brand identity and target audience. For instance, a skincare product might benefit from imagery with water droplets or botanical elements, while a makeup item could be paired with complementary tools or a subtle swatch.
Clean Backgrounds for Uninterrupted Focus
A simple, uncluttered background ensures the product remains the focal point. Seamless white, grey, or pastel paper backdrops are versatile and professional. For a more editorial look, consider textured surfaces like wood, marble, or linen, but ensure they complement the product without competing for attention. The background should always serve to isolate and highlight the product, not overwhelm it.
Technical Considerations for Sharpness and Detail
Beyond lighting and styling, technical camera settings ensure your images are sharp, color-accurate, and ready for commercial use.
- Focus and Depth of Field: For product photography, a sharp focus across the entire product is usually desired. This requires a narrower aperture (higher f-number), typically f/8 to f/16, which increases the depth of field. Use manual focus to ensure critical sharpness on the product's most important features, such as the brand name or key ingredients.
- White Balance Accuracy: Incorrect white balance can cast an undesirable color tint over your products, making them appear different from their true shade. Use a custom white balance setting or select a preset (e.g., "daylight" or "cloudy") that accurately renders colors under your specific lighting conditions. This is crucial for beauty products where exact color representation is paramount.
- Tripods for Stability: A tripod is non-negotiable for sharp product photography. It eliminates camera shake, especially when using slower shutter speeds required by narrower apertures or lower light. This stability is critical for capturing fine details and ensuring consistency across multiple shots.
- Lens Choice: While a standard kit lens can work, a prime lens (e.g., 50mm or 85mm) often offers superior sharpness and a wider aperture for creative depth of field effects. For capturing intricate details like product texture or small text, a macro lens is invaluable.
Post-Processing: Enhancing Without Over-Editing
Post-processing is where good photos become great, but it requires a delicate touch. The goal is enhancement, not distortion.
Essential Adjustments: Color, Exposure, and Contrast
Basic adjustments in editing software (like Adobe Lightroom or Capture One) are fundamental. Correct any slight color casts, adjust exposure to ensure the product is neither too dark nor blown out, and fine-tune contrast to make details pop. The aim is to make the product look its best, true to its physical appearance.
Spot Removal and Dust Cleanup
Beauty products, especially those with glossy finishes, are magnets for dust and fingerprints. Use the spot healing or clone stamp tools to meticulously remove any imperfections, dust specks, or smudges. A clean product image conveys professionalism and attention to detail.
Subtle Retouching for Flawless Presentation
While heavy filters and unrealistic alterations should be avoided, subtle retouching can refine the product's appearance. This might include evening out minor inconsistencies in packaging, gently smoothing reflections, or enhancing the vibrancy of a label. The key is to maintain authenticity; the product should look exactly as a customer would receive it, only perfected.
Pro Tip: Glossy packaging and reflective surfaces are common challenges in beauty product photography. To manage reflections, use large, soft light sources and position them at an angle to the product, rather than directly in front. Employ black or white "flags" (pieces of cardstock) to block unwanted reflections or create defined edges on shiny surfaces. Experiment with angles and light placement to find the sweet spot where reflections enhance, rather than obscure, the product's form.
Elevating Your Visuals for Market Impact
Mastering beauty product photography is an ongoing process of learning and refinement. Each product presents unique challenges and opportunities for visual storytelling. By focusing on controlled lighting, thoughtful composition, technical precision, and judicious post-processing, you create images that not only showcase your products but also communicate their value and desirability. Consistent application of these techniques will build a strong visual brand identity, fostering customer trust and driving sales in a visually-driven market.
Frequently Asked Questions
Q: What's the most important factor in beauty product photography?
A: Lighting is paramount. Proper lighting ensures accurate color representation, highlights textures, and creates an appealing aesthetic, directly impacting how customers perceive the product's quality.
Q: How can I avoid reflections on shiny product packaging?
A: Use large, diffused light sources positioned at an angle to the product. Employ flags or blockers to strategically control and eliminate unwanted reflections, ensuring the product's label and features remain clear.
Q: Do I need a professional camera for good beauty product photos?
A: While professional cameras offer more control, many modern smartphones with good cameras can produce excellent results, especially when paired with proper lighting, a tripod, and careful composition. The technique often outweighs the equipment.
Q: How much post-processing is acceptable for beauty products?
A: Post-processing should enhance without altering the product's true appearance. Focus on color correction, exposure adjustments, and removing dust or imperfections. Avoid heavy filters or unrealistic alterations that could mislead customers about the product's actual look.