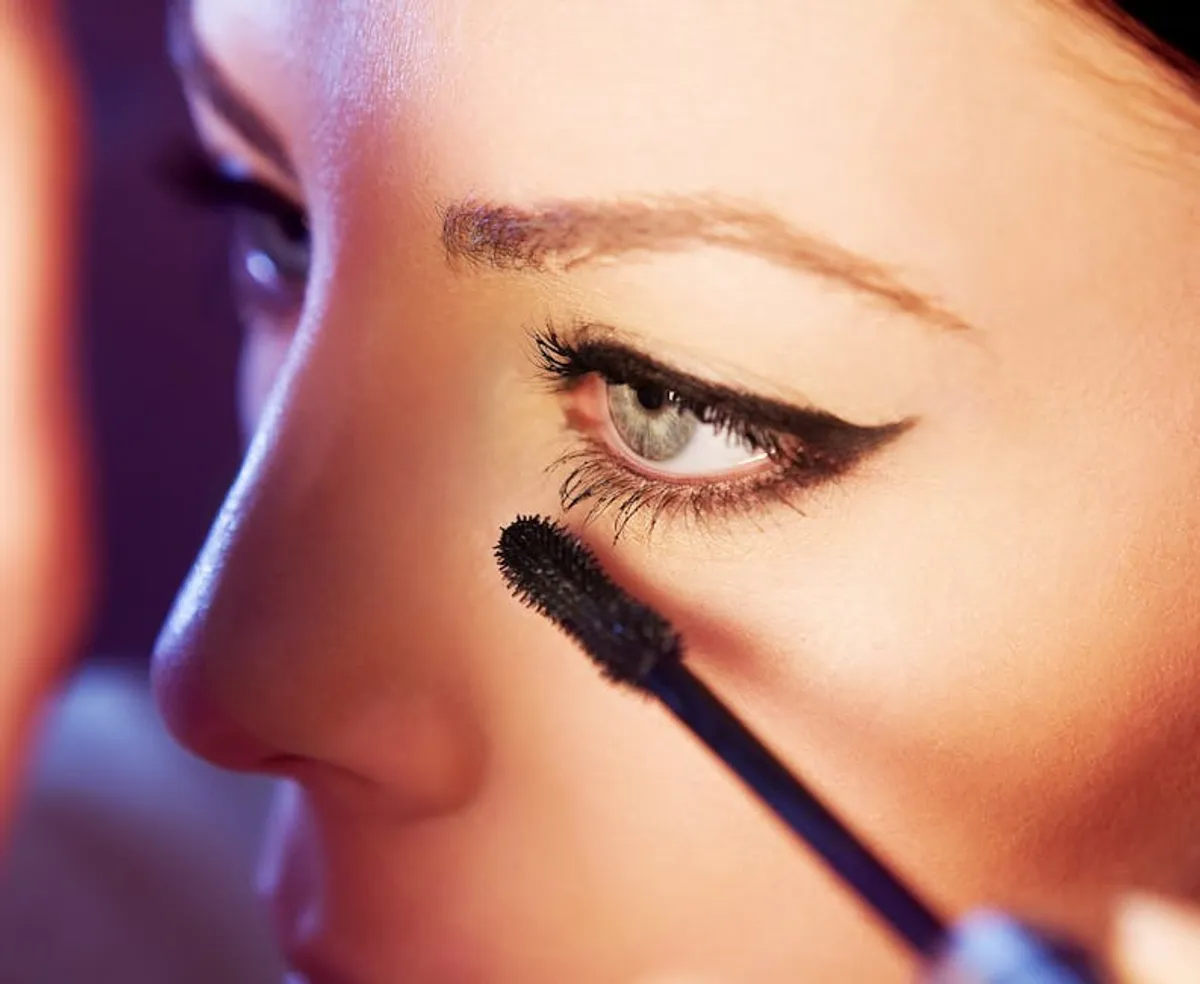
Achieving the appearance of significantly longer lashes through mascara application is a skill refined by understanding specific techniques and product interaction. The objective is not simply to apply mascara, but to strategically build length, separate individual lashes, and create a fanned-out effect that maximizes their natural potential. This requires a deliberate approach, moving beyond a single swipe to a multi-step process that leverages the properties of the mascara itself and the mechanics of application tools.
Foundational Principles for Lash Length
Before any mascara tube is opened, certain foundational principles influence the final outcome. Lash health, for instance, dictates how well lashes hold a curl and how evenly mascara can be distributed. Hydrated, flexible lashes are less prone to breakage and more receptive to styling. Furthermore, the type of mascara formula—whether lengthening, volumizing, or curling—plays a direct role in the visual effect. Lengthening mascaras typically contain fibers or polymers that extend beyond the natural lash tip, while volumizing formulas add thickness. Understanding these distinctions allows for a more targeted approach, often combining different product types for a customized result. The condition of application tools, particularly lash curlers and mascara wands, also impacts efficacy. Clean, well-maintained tools ensure precise application and prevent clumping, which can counteract efforts to create a longer, separated look.
1. Proper Lash Curling
Effective lash curling forms the structural basis for length. A well-executed curl lifts the lashes from the root, making them appear longer by projecting them outward and upward rather than straight forward. This technique involves three distinct presses with a clean, high-quality eyelash curler: one at the root, one in the middle, and a final, lighter press at the tips. Each press should be held for five to ten seconds to set the curl without crimping. The root curl provides maximum lift, the middle curl defines the arc, and the tip curl refines the overall shape. This multi-point approach ensures a natural-looking, durable curl that maximizes visible lash length.
Best for: Straight or downward-pointing lashes, creating an immediate visual lift and opening the eye area.
Pros: Significantly enhances perceived length; creates an open, awake appearance; improves mascara adherence and distribution.
Cons: Requires a quality curler to avoid pinching or lash damage; technique must be precise to prevent a crimped or unnatural angle.
Verdict: Non-negotiable for maximizing length, as it provides the necessary upward trajectory for lashes to appear their longest.
2. Primer Application
Mascara primer acts as a preparatory layer, conditioning lashes and providing a textured base for mascara to adhere to. These primers often contain fibers that extend the natural lash, similar to some lengthening mascaras, but without the pigment. When applied before mascara, the primer coats each lash, creating a smoother, more uniform surface that prevents clumping and allows mascara to build more effectively. The white or clear base also intensifies the subsequent mascara color, making the lashes appear denser and longer. It effectively creates a scaffolding for the mascara to build upon, enhancing both length and volume.
Best for: Short or sparse lashes, enhancing the performance of any mascara formula.
Pros: Adds immediate length and volume; prevents clumping; conditions lashes; improves mascara wear time.
Cons: Adds an extra step to the routine; some formulas can feel heavy if over-applied; requires careful application to avoid visible white residue.
Verdict: A strategic layer that significantly boosts the lengthening and volumizing capabilities of any mascara, particularly beneficial for less defined lashes.
3. Wipe Excess Product
Overloading the mascara wand with product is a common error that leads to clumping and uneven application, hindering length. Before applying mascara to lashes, gently wipe any excess product from the wand onto the rim of the tube or a tissue. This action ensures that only a precise amount of mascara is transferred to the lashes, allowing for a cleaner, more controlled application. A wand with less product facilitates better separation of individual lashes, which is crucial for building length without creating a heavy, spider-leg effect. This simple step prevents the accumulation of too much formula at the base, ensuring an even coat from root to tip.
Best for: All mascara types, especially those with thick formulas or large wands prone to picking up too much product.
Pros: Prevents clumping; ensures even application; allows for better lash separation; builds length more effectively.
Cons: Requires an extra moment before application; can waste a small amount of product.
Verdict: A fundamental technique for achieving clean, separated, and visibly longer lashes by controlling product distribution.
4. Wiggle and Lift Technique
The wiggle and lift technique is critical for coating lashes from the very root and extending them upwards. Begin by placing the mascara wand at the base of the upper lashes, as close to the eyelid as possible. Then, gently wiggle the wand horizontally back and forth a few times to deposit product at the root, ensuring full coverage and creating a fuller lash line illusion. Immediately after wiggling, sweep the wand upwards towards the tips, lifting and separating each lash. This motion not only coats the entire lash but also helps to extend and define, preventing a heavy base with bare tips. This technique provides both volume at the root and length through the body of the lash.
Best for: Maximizing root-to-tip coverage and creating a fanned-out effect.
Pros: Ensures full lash coverage; builds volume at the base; extends length effectively; separates lashes.
Cons: Requires a steady hand and practice for precision; can lead to smudges on the eyelid if not careful.
Verdict: Essential for comprehensive lash coating and upward extension, directly contributing to the perception of longer, fuller lashes.
5. Focus on Tips
After applying mascara with the wiggle and lift technique, a targeted application to the very tips of the lashes can dramatically increase perceived length. Once the main body of the lashes is coated, use the tip of the mascara wand, or a clean, fine-tipped brush, to gently apply an additional touch of mascara to the absolute ends of the lashes. This precise application extends the natural lash line, making them appear longer without adding bulk to the base. This method is particularly effective with fiber-based lengthening mascaras, as the fibers can cling to the existing mascara at the tips and visibly extend beyond. It's a finishing touch that pushes the boundaries of natural lash length.
Best for: Adding incremental length to already coated lashes, especially with fiber-rich formulas.
Pros: Visibly extends lash length; creates a delicate, elongated effect; avoids clumping at the base.
Cons: Requires a light hand and precision to avoid a spidery look; can be time-consuming for beginners.
Verdict: A fine-tuning step that provides a noticeable boost in length, particularly when aiming for maximum extension.
6. Layering Mascara
Layering mascara involves applying multiple thin coats rather than one thick application. This technique allows each layer to build upon the previous one, adding incremental length and volume without overwhelming the lashes. The key is to apply subsequent coats while the previous one is still slightly tacky, but not fully dry. If mascara dries completely between coats, it can lead to flaking and clumping. Each thin layer contributes to a more extended, defined lash, allowing for greater control over the final look. This method also helps to ensure that every lash is evenly coated and separated, contributing to a more uniform and elongated appearance.
Best for: Building customizable length and volume; preventing heavy, clumpy lashes.
Pros: Allows for controlled build-up of length; prevents clumping; ensures even coating; creates a more dramatic effect.
Cons: Requires patience between coats; can lead to heavy lashes if too many layers are applied or if coats dry completely.
Verdict: A strategic approach to building significant length and volume, offering control and preventing common application issues associated with single, heavy coats.
7. Bottom Lashes First
Applying mascara to the bottom lashes before the top lashes helps prevent smudging on the upper eyelid. When top lashes are coated first, they are still wet and can transfer product to the eyelid when looking down to apply to the bottom lashes. By addressing the bottom lashes first, the top lashes remain untouched and dry, minimizing the risk of accidental transfer. This order of application also allows for a more focused approach to the top lashes, as there's no concern about disturbing already wet mascara. While seemingly minor, this sequence contributes to a cleaner application, which in turn supports a more polished and defined overall look for both upper and lower lashes, enhancing the perception of length.
Best for: Preventing smudges on the upper eyelid; ensuring a cleaner, more precise application.
Pros: Reduces smudging and cleanup time; allows for more focused application on upper lashes; maintains a neat appearance.
Cons: Requires a conscious change in application routine for some.
Verdict: A practical sequencing tip that streamlines the application process and prevents common smudging issues, contributing to a neater, more defined lash look.
8. Comb Through
Using a clean lash comb immediately after mascara application, while the product is still wet, is crucial for separating lashes and removing any excess product or clumps. This action ensures that each lash stands individually, preventing the "spider leg" effect that diminishes the appearance of length. By gently combing from the base to the tips, the tool distributes the mascara evenly, elongates the lashes, and defines their shape. This step is particularly effective for enhancing the natural fanned-out look, allowing each lash to contribute to the overall length without being obscured by neighboring clumps. A metal lash comb is generally more effective than plastic for precise separation.
Best for: Eliminating clumps; separating individual lashes; defining and fanning out lashes.
Pros: Dramatically improves lash separation; removes excess product; enhances the appearance of length; creates a polished finish.
Cons: Requires a dedicated lash comb; must be done quickly before mascara dries to avoid tugging.
Verdict: An indispensable step for achieving perfectly separated, defined, and visibly longer lashes, transforming a potentially clumpy application into a refined one.
9. Use a Second Coat of a Different Formula
Combining mascara formulas can create a synergistic effect, leveraging the strengths of each product. For instance, applying a lengthening mascara as the first coat establishes the initial extension and separation. Once this layer is set (but not fully dry), a second coat of a volumizing mascara can be applied to add thickness and depth without sacrificing the length already achieved. This technique builds a multi-dimensional lash look, where length is maximized by the first formula and then amplified by the second. The key is to select formulas that complement each other and do not become overly heavy or clumpy when layered.
Best for: Achieving both significant length and volume; customizing lash appearance.
Pros: Combines the benefits of different mascara types; creates a dramatic, multi-dimensional effect; offers greater control over the final look.
Cons: Requires two different mascara products; can feel heavy if formulas are not compatible or applied too thickly.
Verdict: An advanced technique for those seeking to maximize both length and fullness, offering a highly customized and impactful lash result.
10. Angle the Wand
Varying the angle of the mascara wand during application can significantly influence the direction and perceived length of lashes. Instead of applying mascara straight on, try angling the wand diagonally, especially for the outer corner lashes. For the outer lashes, angle the wand towards the temple to fan them outwards, creating a cat-eye effect that visually elongates the eye. For the inner corner lashes, angle the wand towards the nose to ensure full coverage and prevent a gap. This strategic angling allows for a more precise coating of each lash group, directing them to create a wider, more open, and ultimately longer-looking lash line.
Best for: Customizing lash direction; enhancing eye shape; creating a fanned-out or lifted effect.
Pros: Defines lash direction; creates a wider, more open eye; enhances perceived length by fanning out lashes.
Cons: Requires conscious effort and practice to master different angles.
Verdict: A subtle yet impactful technique that manipulates lash direction to enhance overall eye shape and maximize the visual impact of lash length.
11. Zig-Zag Application
The zig-zag application technique ensures comprehensive coating and separation of lashes. Instead of a straight sweep, move the mascara wand in a zig-zag motion from the root to the tip of the lashes. This back-and-forth movement helps to deposit product evenly on all sides of each lash, ensuring full coverage and preventing any bare spots. The zig-zag action also helps to separate lashes as the bristles move through them, reducing clumps and allowing each lash to stand out individually. This thorough coating and separation are fundamental for building length without a heavy, stuck-together appearance.
Best for: Ensuring full, even coating; separating lashes effectively; building length without clumping.
Pros: Deposits product evenly; separates lashes; prevents clumps; ensures comprehensive coverage.
Cons: Can be slower than a straight sweep; requires a steady hand to avoid smudging.
Verdict: A foundational technique that ensures optimal product distribution and lash separation, directly contributing to a longer, more defined lash look.
12. Clean Your Brush Regularly
Maintaining a clean mascara wand, whether it's the one from the tube or a separate disposable brush, is crucial for optimal application and hygiene. Over time, mascara wands accumulate dried product, dust, and bacteria, which can lead to clumpy application, reduced efficacy, and potential eye irritation. Regularly cleaning the wand (if it's a reusable separate brush) or ensuring the tube's wand is free of dried clumps by wiping it before use prevents the transfer of old, hardened mascara onto fresh lashes. A clean wand allows for smooth, even distribution of fresh product, which is essential for building length without creating an undesirable texture or compromising lash health.
Best for: Maintaining product integrity and hygiene; ensuring smooth, clump-free application.
Pros: Prevents clumping; ensures even product distribution; reduces risk of eye irritation; extends the life of the mascara.
Cons: Requires consistent attention to cleaning or wiping.
Verdict: A critical maintenance step that directly impacts the quality of mascara application, ensuring smooth, separated, and visibly longer lashes.
Integrating Techniques for Optimal Length
Maximizing lash length with mascara is not about a single magic product or technique, but rather a synergistic combination of several precise steps. The most effective approach integrates preparatory actions like proper curling and priming with meticulous application techniques such as the wiggle and lift, layering, and strategic angling. Success is measured by consistent, clump-free separation, a noticeable upward lift, and a visible extension beyond the natural lash line. Experimentation with different combinations of these tips will reveal which methods best suit individual lash types and desired aesthetic outcomes. The goal is to achieve a fanned-out, elongated effect that enhances the eye's natural shape without appearing heavy or artificial. Consistent practice and attention to detail in each step contribute to a polished, long-lasting result.
Frequently Asked Questions
How can I prevent mascara from clumping when trying to build length?
To prevent clumping, always wipe excess product from the mascara wand before application. Use the wiggle and lift technique to coat lashes from the root, and apply mascara in thin, buildable layers. Immediately after application, use a clean lash comb to separate any stuck-together lashes while the mascara is still wet.
Is it better to use a lengthening or volumizing mascara for longer-looking lashes?
For primarily longer-looking lashes, a lengthening mascara is generally more effective as it contains fibers or polymers designed to extend beyond the lash tip. However, combining a lengthening mascara with a volumizing one (applying lengthening first, then volumizing) can create a dramatic effect that offers both length and fullness.
How often should I replace my mascara to ensure optimal application?
Mascara should be replaced every three to six months to prevent bacterial growth and maintain product efficacy. Old mascara tends to dry out, becoming clumpy and less effective at building length and separating lashes. Replacing it regularly ensures a fresh, smooth application.
Can I use a heated eyelash curler for better length?
Heated eyelash curlers can enhance and set a curl, which contributes to the appearance of length. If using one, ensure lashes are clean and dry, and apply mascara only after curling. Use caution to avoid direct contact with the eyelid and prevent heat damage to the lashes.
What is the best way to remove mascara without damaging my lashes?
Use a gentle, oil-based eye makeup remover or micellar water. Soak a cotton pad with the remover, press it gently onto your closed eye for 10-20 seconds to allow the product to dissolve the mascara, then gently wipe downwards. Avoid harsh rubbing or pulling, as this can lead to lash breakage and loss.